DIY Elopement Wedding Bouquet
How to Make Your Own Epic Elopement Bouquet
A Guide to Making Your Own Elopement Bouquet
If you’re eloping and don’t want to worry about hiring a florist to create your bouquet, DIYing your own can be a great option. Not only are DIY elopement wedding bouquets super budget friendly, but they also allow you to add your own personal touch to your elopement look.
The flowers I used in this DIY elopement wedding bouquet were all purchased from Trader Joe’s. I personally love the selection of flowers Trader Joe’s has, and they’re always such a good deal. The blooms and greenery that I used to make this bouquet only cost me a little over $30.
Ready to learn how to create your own elopement bouquet? In this article, we’ll start by going over a few important things to think about when designing your wedding bouquet, we’ll review a quick shopping list of bouquet essentials, and lastly, I’ll do a step-by-step tutorial (with photos!) showing you how you can create your own wedding bouquet.
Disclosure: I’ve included links to all the tools you’ll need to put your DIY elopement bouquet together. Should you purchase your tools through my links, I may earn a commission, at no cost to you. Shopping through my links helps support this small business. All items I’ve included are sold from selling platforms I use and trust myself.
Planning for Your Elopement Bouquet
Things to Consider Before Going Shopping
- Do you have a certain color palette you’re going for? I typically recommend having at least one type of greenery to be the base for your bouquet. Then choose 2 to 3 flowers that work well together from a color perspective.
- Think about the shape you want your bouquet to have. This elopement bouquet how-to guide is specifically for creating a more loose, laid-back, boho style wedding bouquet.
- One thing you’ll want to consider is whether you want all sides of the bouquet to feel the same, or if you want to have the bouquet have a distinct front to it. If you’d like there to be a distinct front, you’ll want to ensure you have some taller stems in the back, so the back of the bouquet is taller and staggers down in height as you move to the front. This creates a layered look to the arrangement.
- Be gentle with your flowers. Putting together a wedding bouquet can be a challenge, but be patient with your flowers, and treat them with care. This becomes especially important towards the end, where you’re squeezing your final detail flowers into tighter spaces in the bouquet.
DIY Wedding Bouquet Requirement #1
At least one type of greenery, and 2-3 types of flowers
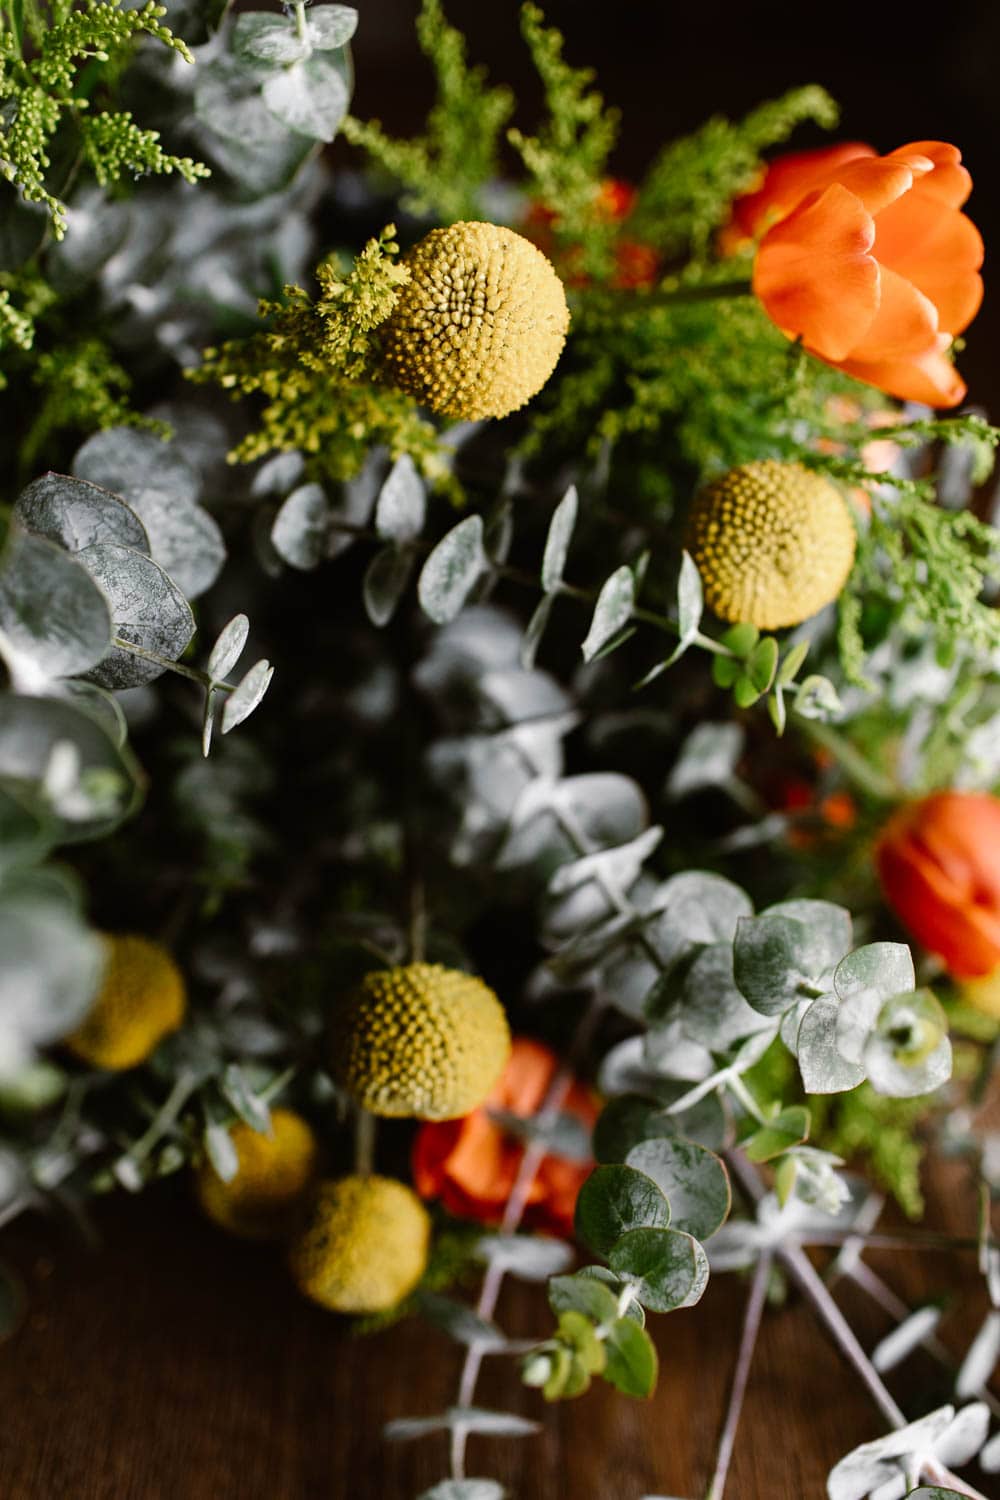
I recommend having at least one type of greenery (my favorite is eucalyptus, since it’s sturdy enough to withstand hiking elopements).
Then, choose 2-3 flowers, based on your preferred color palette. I chose two brightly colored flowers (orange tulips and yellow craspedia) and one filler flower.
DIY Wedding Bouquet Requirement #2
Decorative ribbon and shears
You’ll need two types of shears (shears to cut your stems and to cut your ribbon). Speaking of ribbon, this is where you can add your own personal touch to your DIY wedding bouquet.
Think about whether you want a hand-dyed silk ribbon (the material I’ve used), chiffon ribbon, velvet ribbon, etc.
DIY Wedding Bouquet Requirement #3
Rubber bands and green floral tape to secure your DIY wedding bouquet
I like having rubber bands handy when creating an elopement bouquet. You’ll quickly realize how heavy the flowers can be, so having a rubber band to secure as you go will help a lot.
Waterproof green floral tape will also be extremely helpful. You’ll wrap this around your elopement bouquet when it’s done.
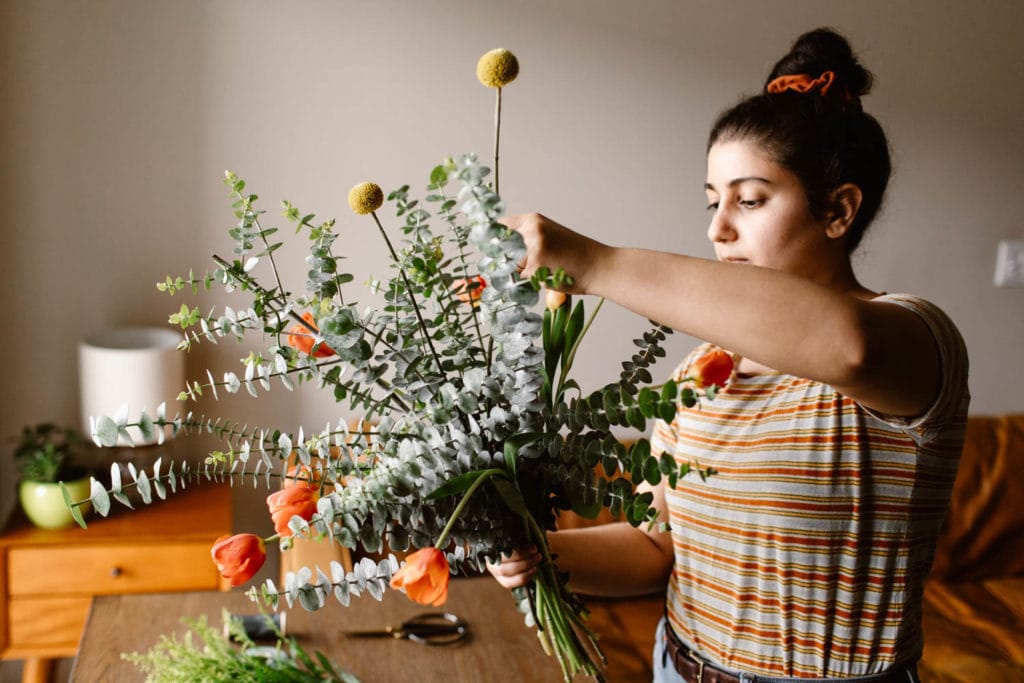
DIY Wedding Bouquet Step 1
Group Your Flowers and Greenery by Type
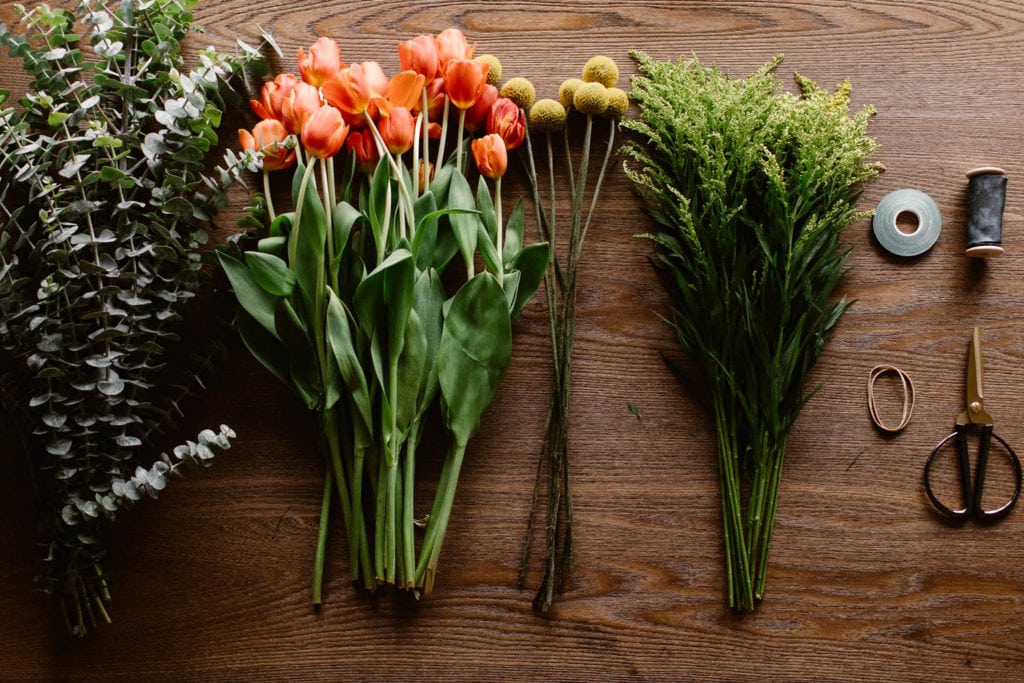
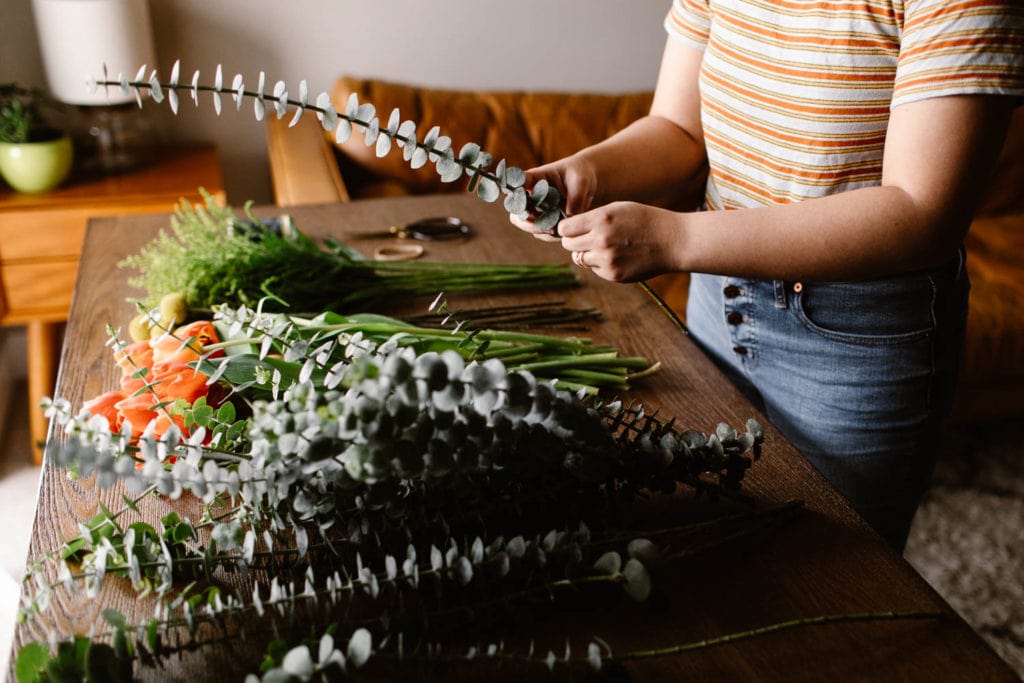
Group the flowers and greenery you’re using for your DIY wedding bouquet by their type and lay them out on an easily accessible surface, like a table or countertop.
As you’re building your DIY elopement wedding bouquet, this’ll help avoid situations where you have to sift for the type of flower you need.

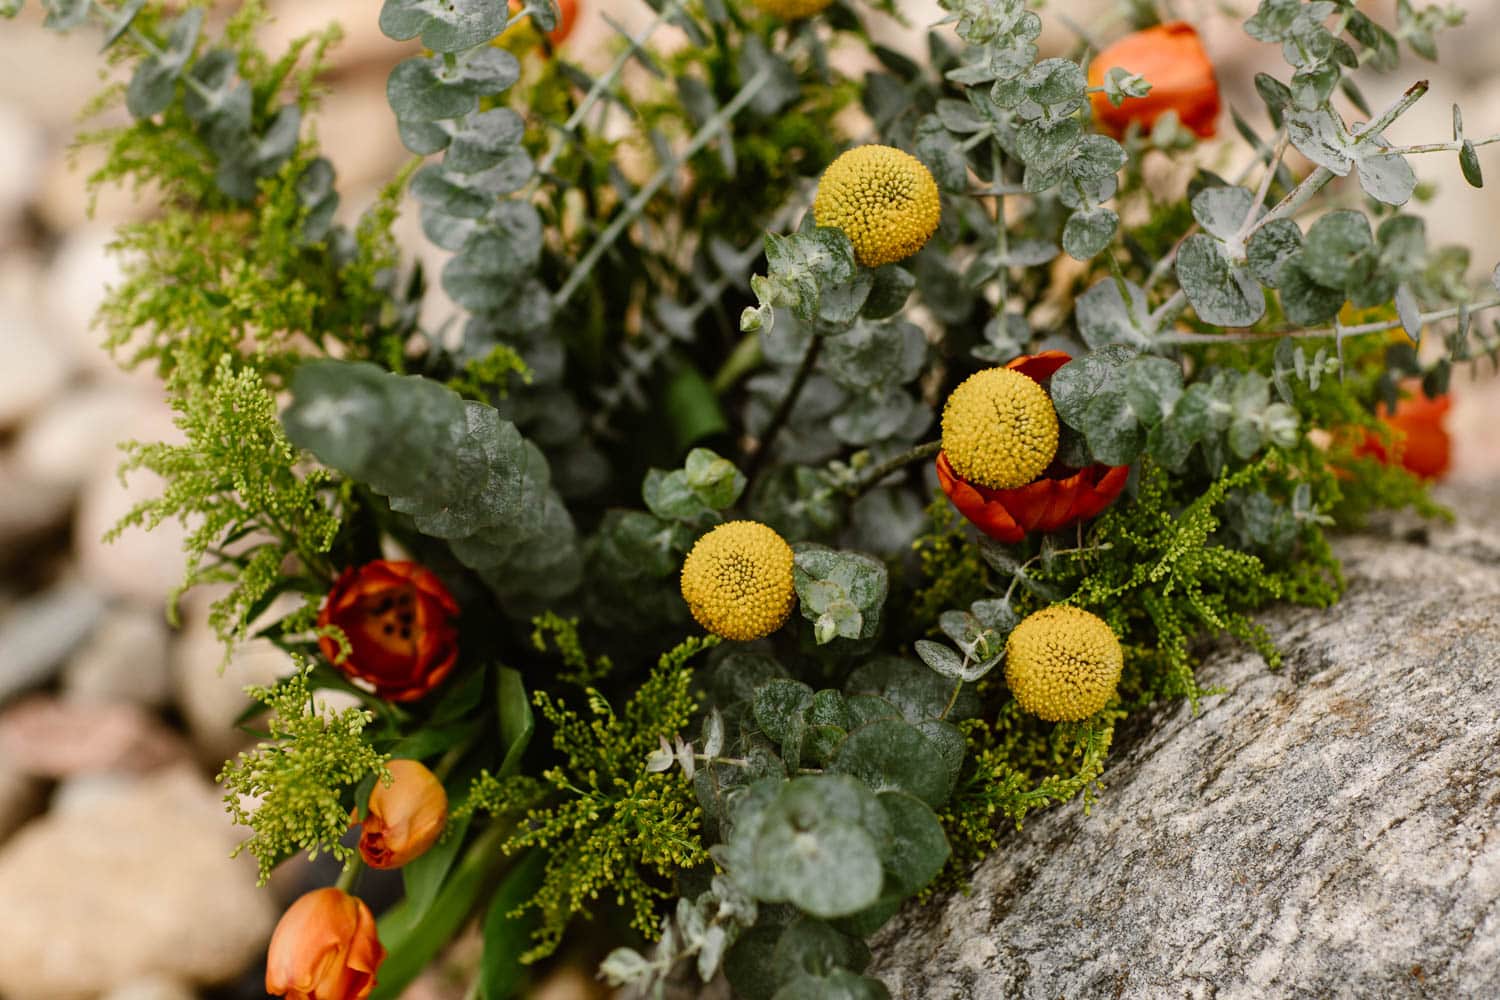
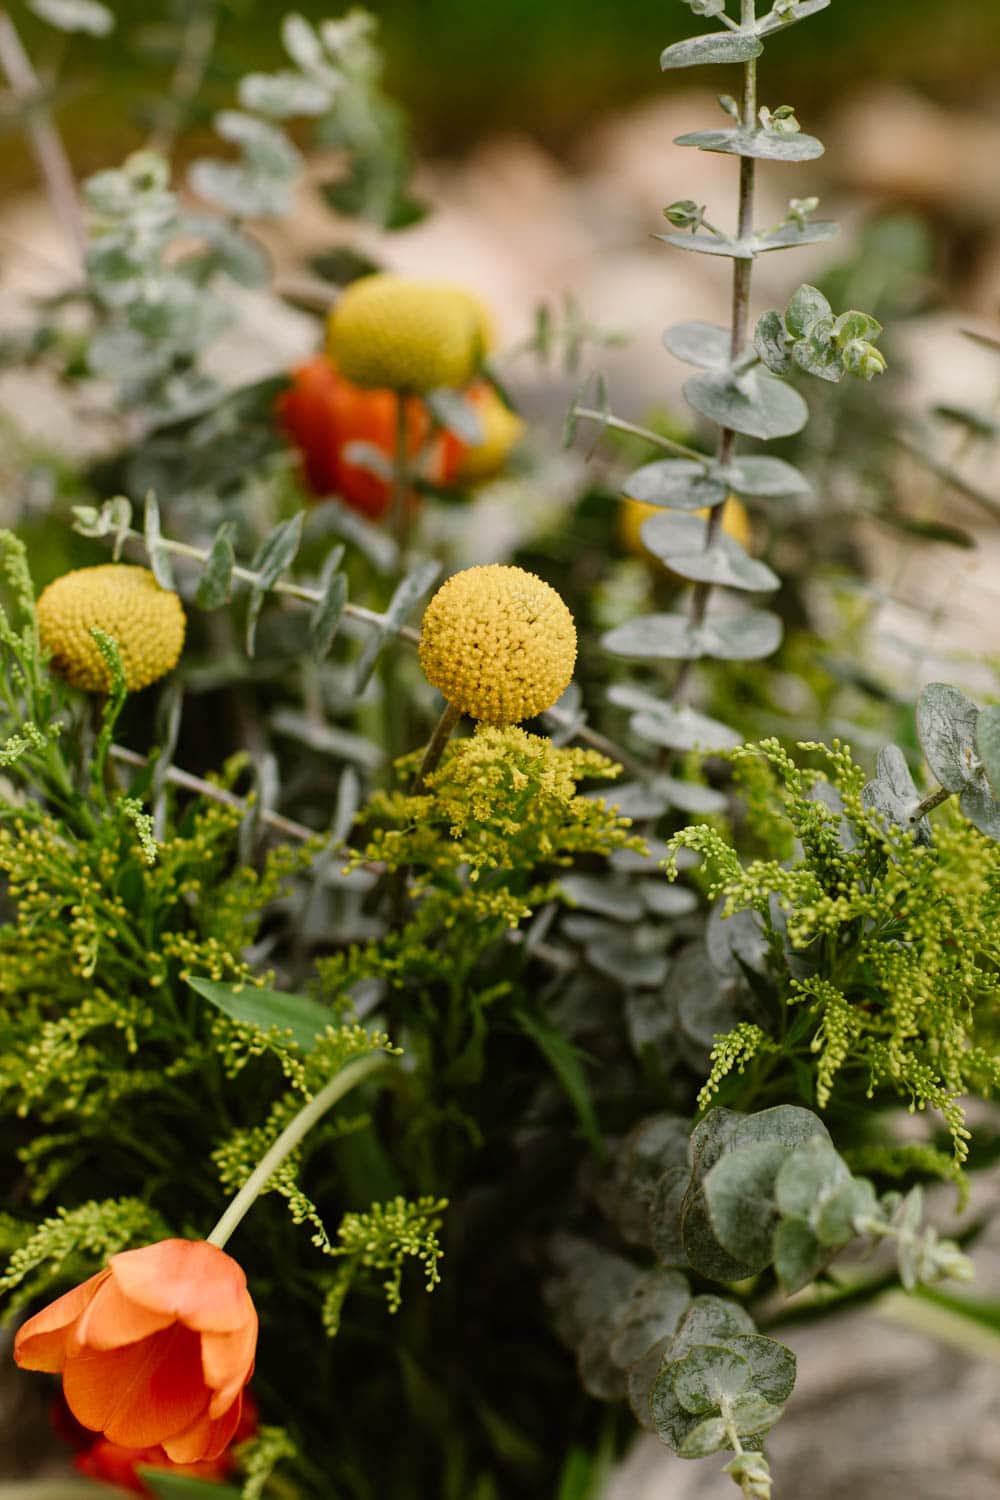
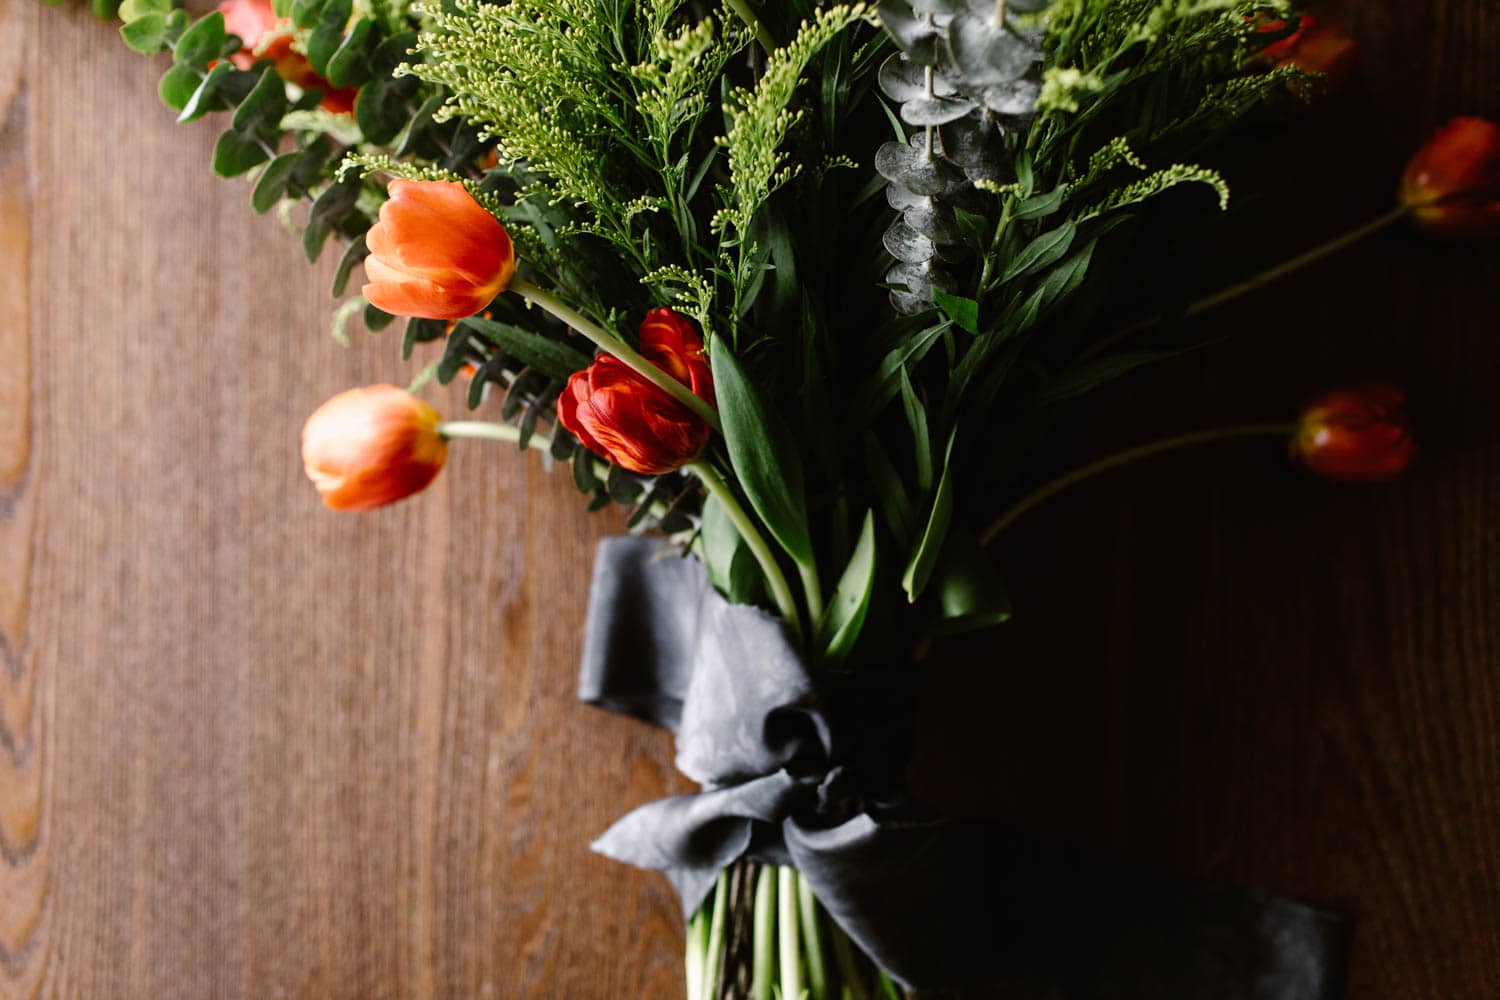
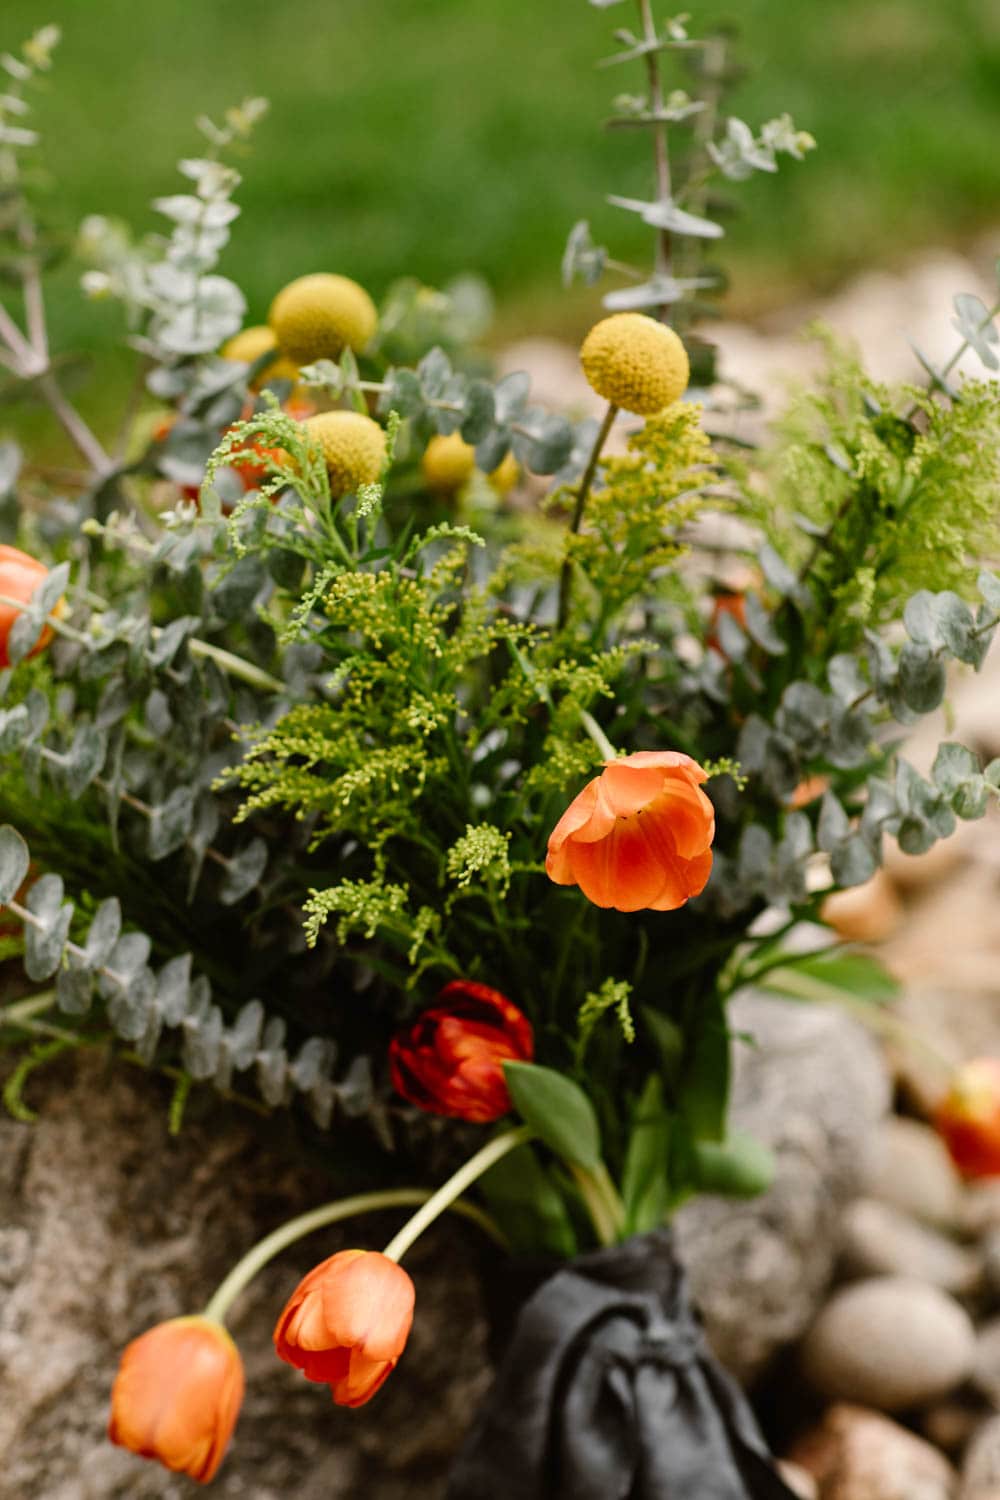
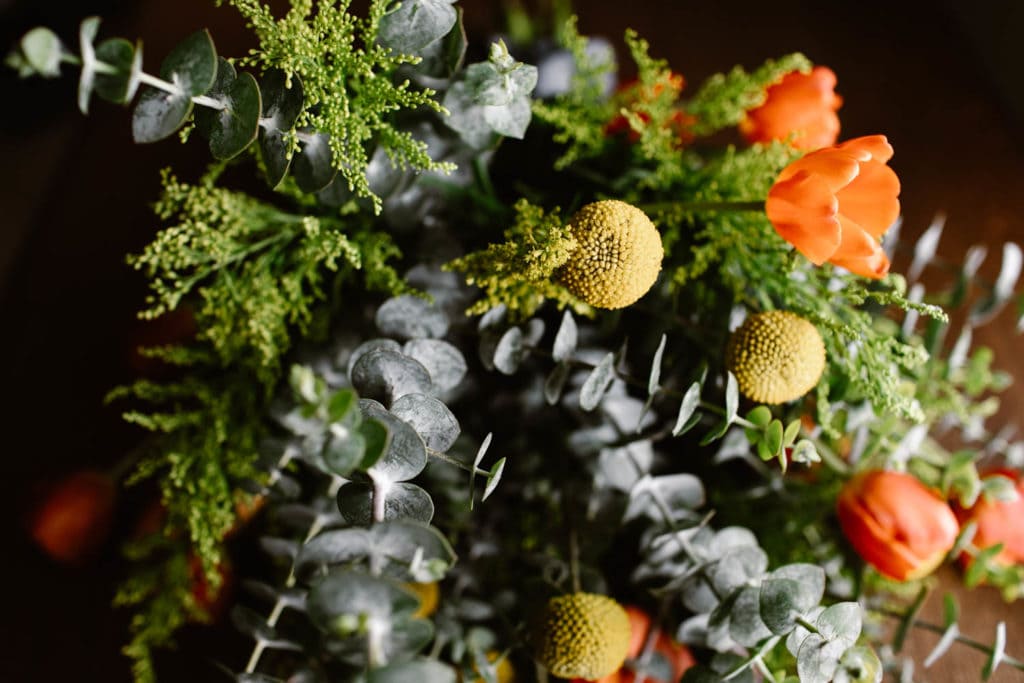
As you can see above, for my greenery, I chose eucalyptus. Eucalyptus is such a sturdy plant, which makes it ideal for adventure elopement bouquets (plus, it smells amazing!). If you’re hiking anywhere with your bouquet, or you’re in an area that gets pretty windy, eucalyptus can hold its own.
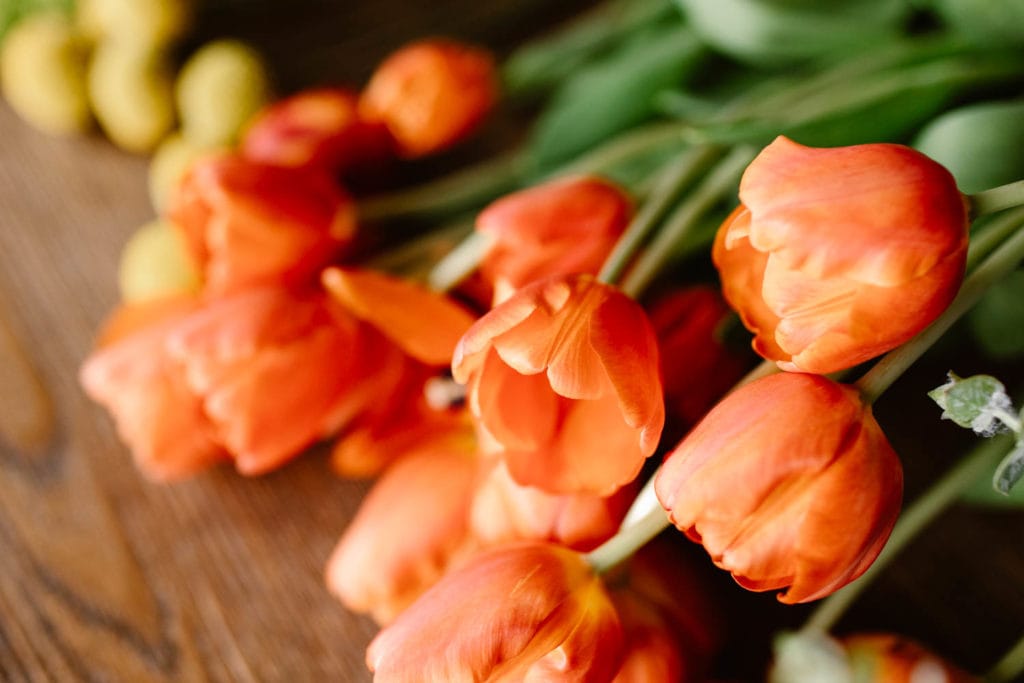
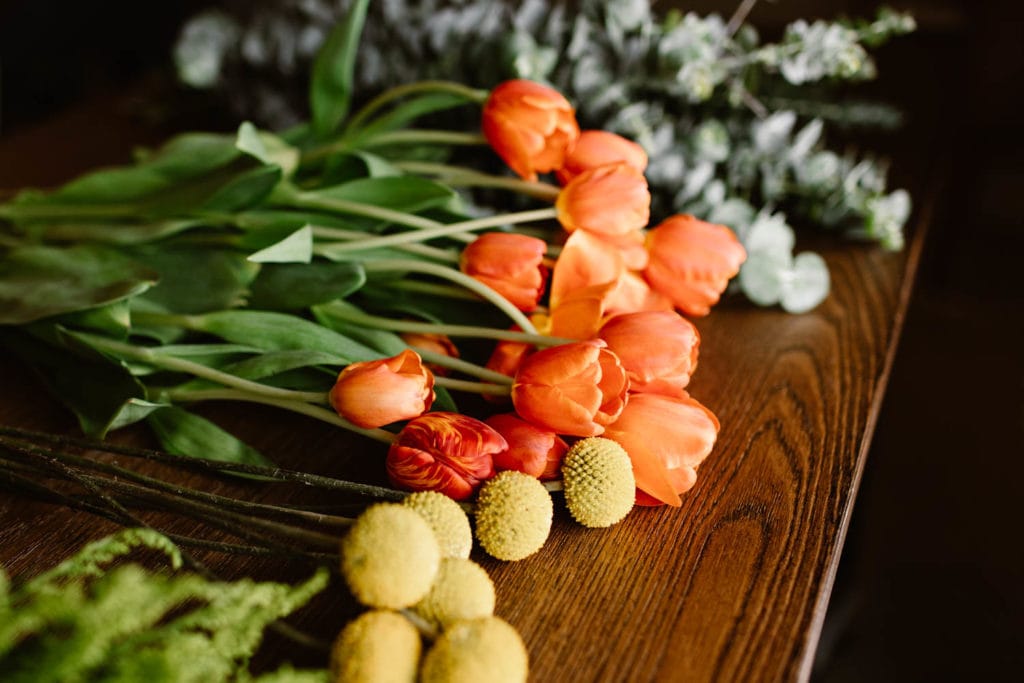
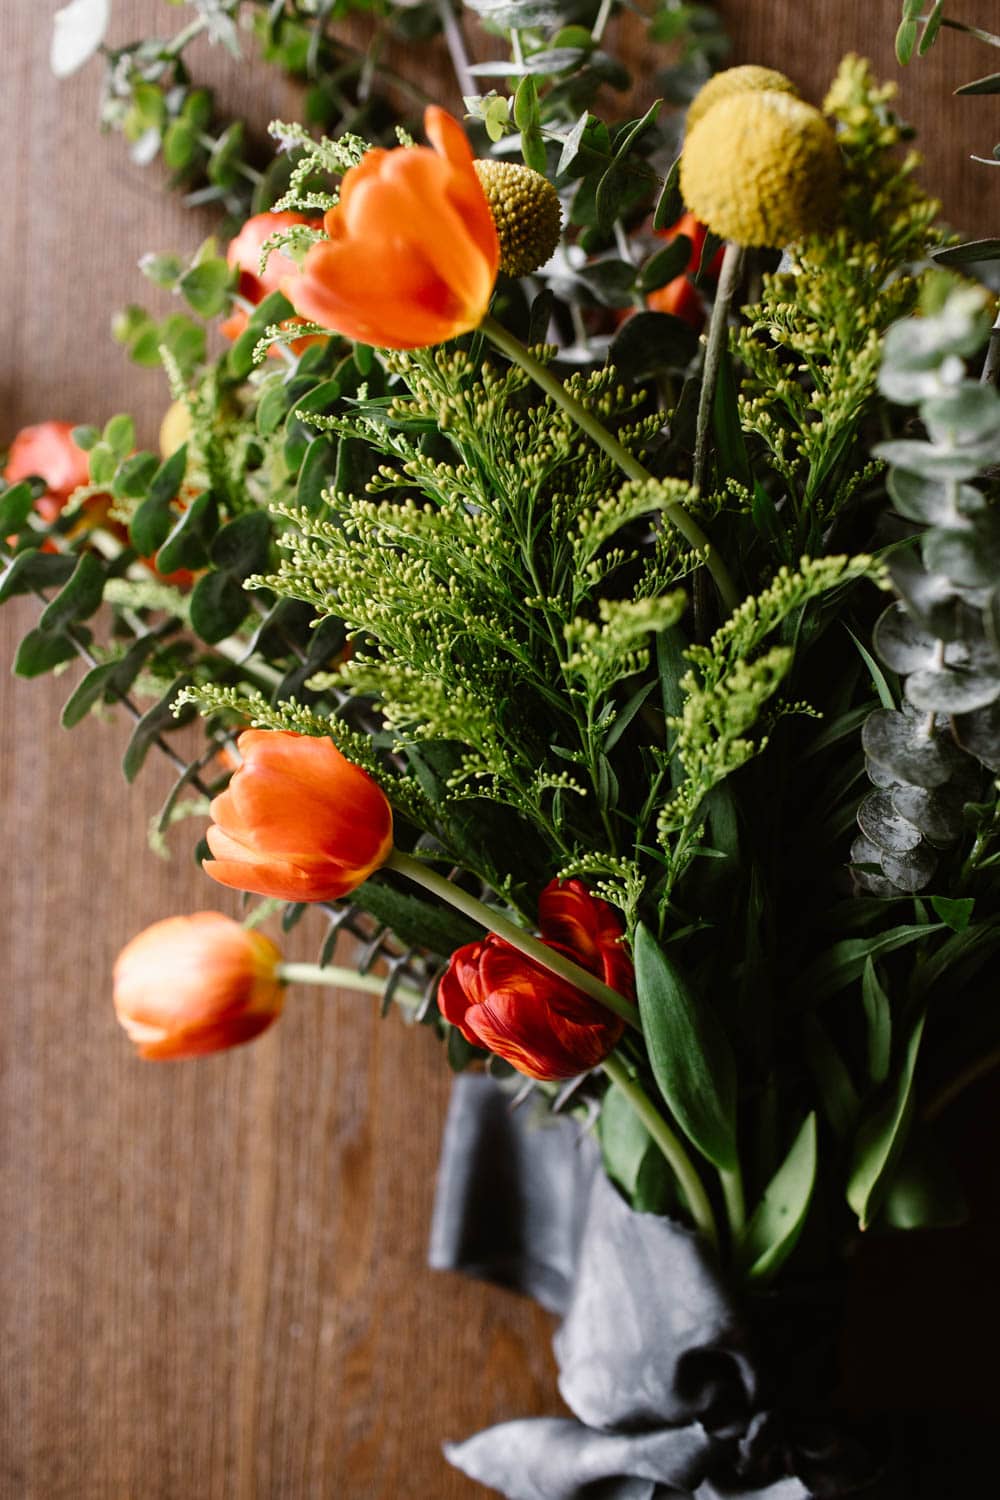
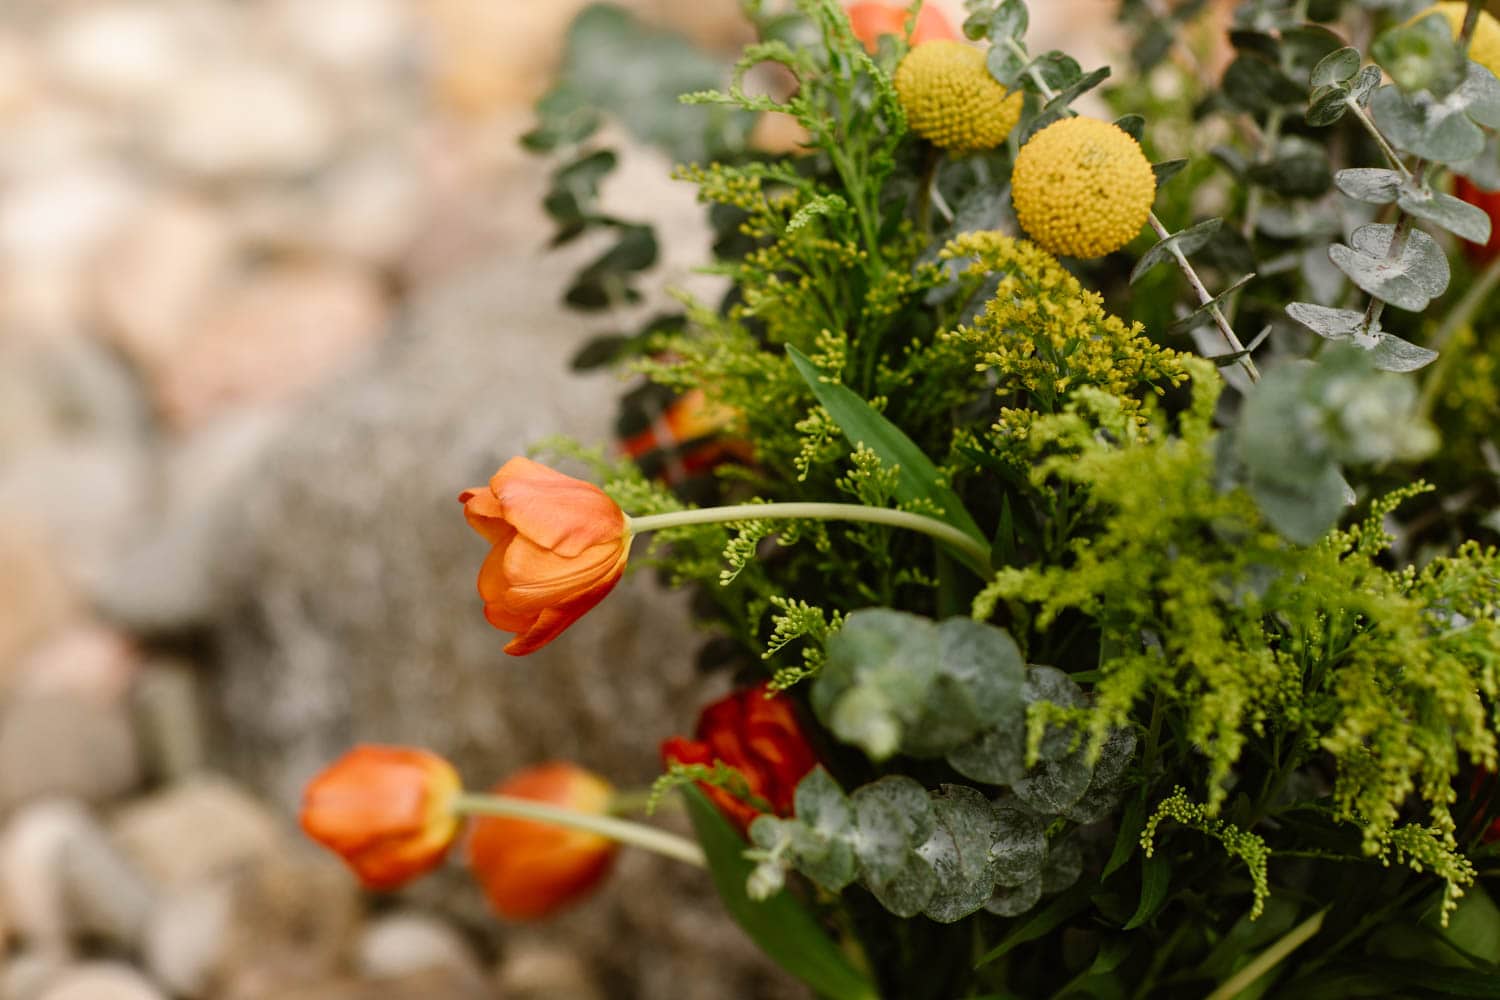
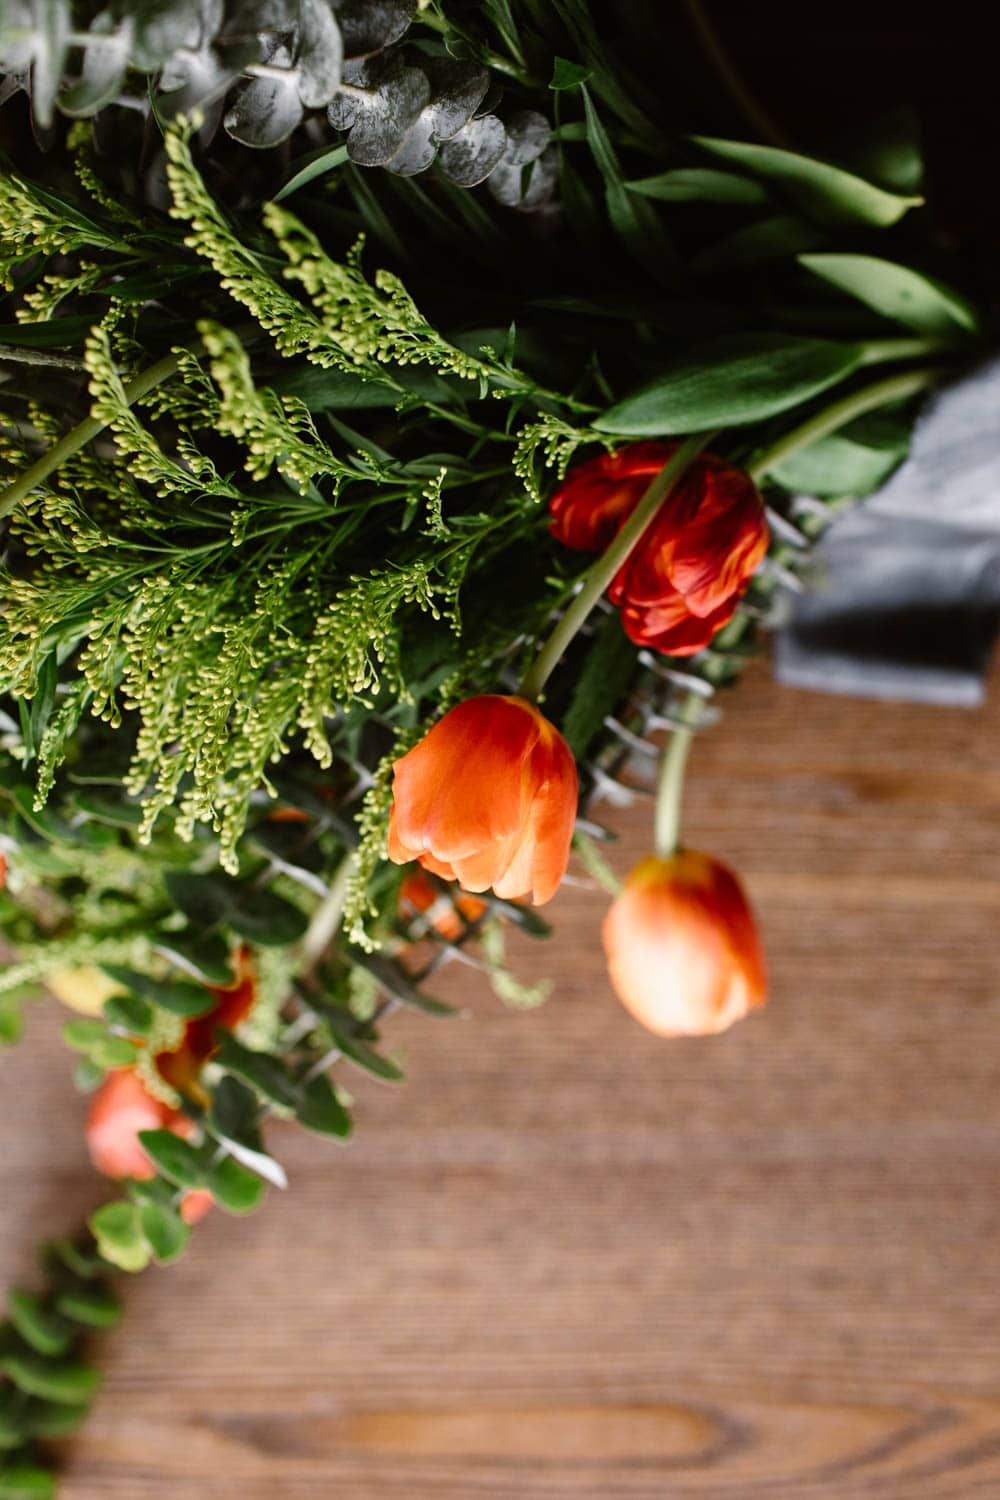
Tulips are in season in the springtime, and I loved the orangey-red color of these ones, so I chose them as one of my key flowers.
One thing to note about tulips: they are a pretty delicate stem. Unlike eucalyptus, and the other flowers I used in this bouquet, tulips can’t really take a beating when hiking.
That said, I personally loved how loosey goosey they looked. They have a sort of whimsical vibe that added a dynamic look to my DIY elopement wedding bouquet, so I went with them.
However, if you’re looking for a super sturdy flower, I would choose one with a heartier stem that the tulip.
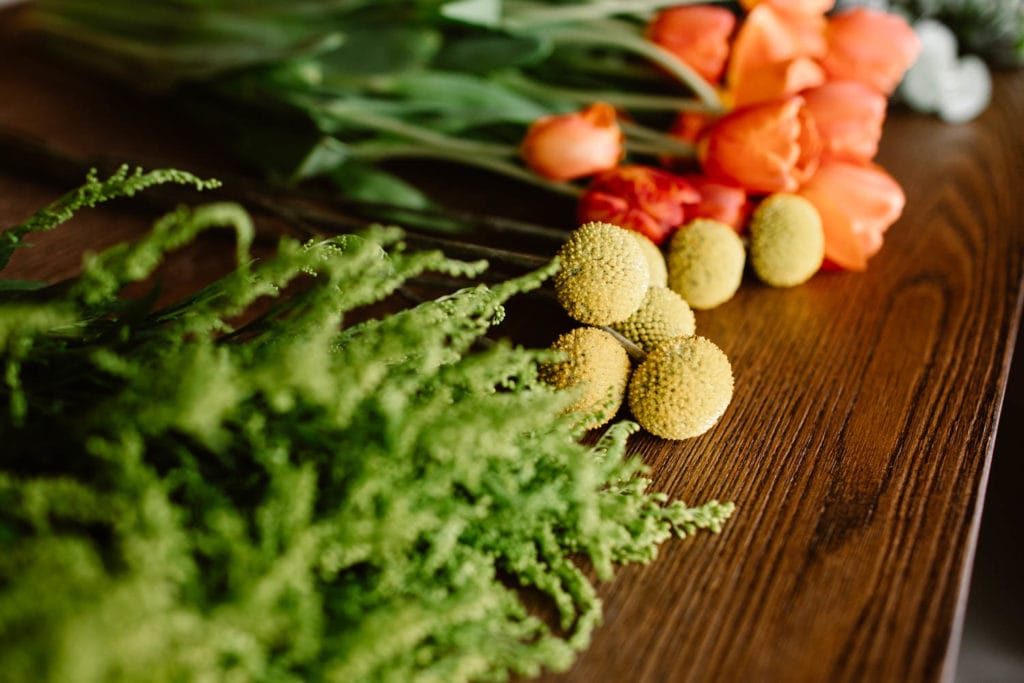
The yellow flowers in the photo above are craspedia. I loved the energy and vibrance they had, and knew they’d make the bouquet feel playful.
They also have this wildflower-like look that worked well for the more hand-crafted, laid-back, boho vibe I was going for with this elopement bouquet.
The last flower (the greenish yellow one), is just a filler flower, which I used to quite literally fill the gaps and add a little more volume to the bouquet.
I wanted something that complemented the yellows and oranges I’d chosen, without overpowering they key flowers in the bouquet. Filler flower does exactly that. Another example of filler flower is baby’s breath.
DIY Wedding Bouquet Step 2
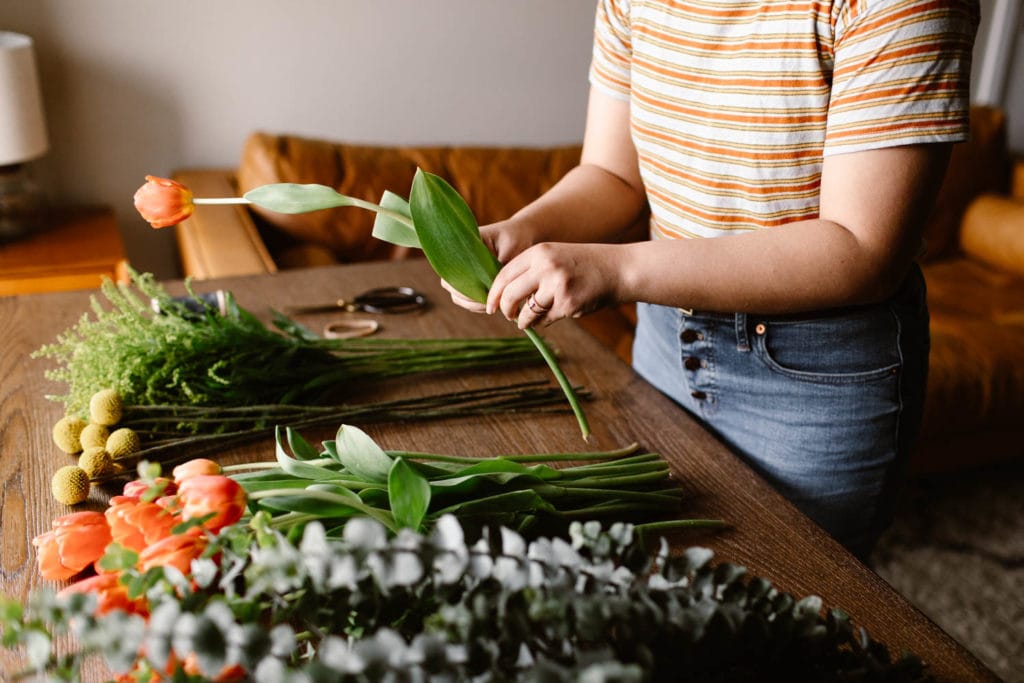
Prep The Stems that Will Go in Your DIY Wedding Bouquet
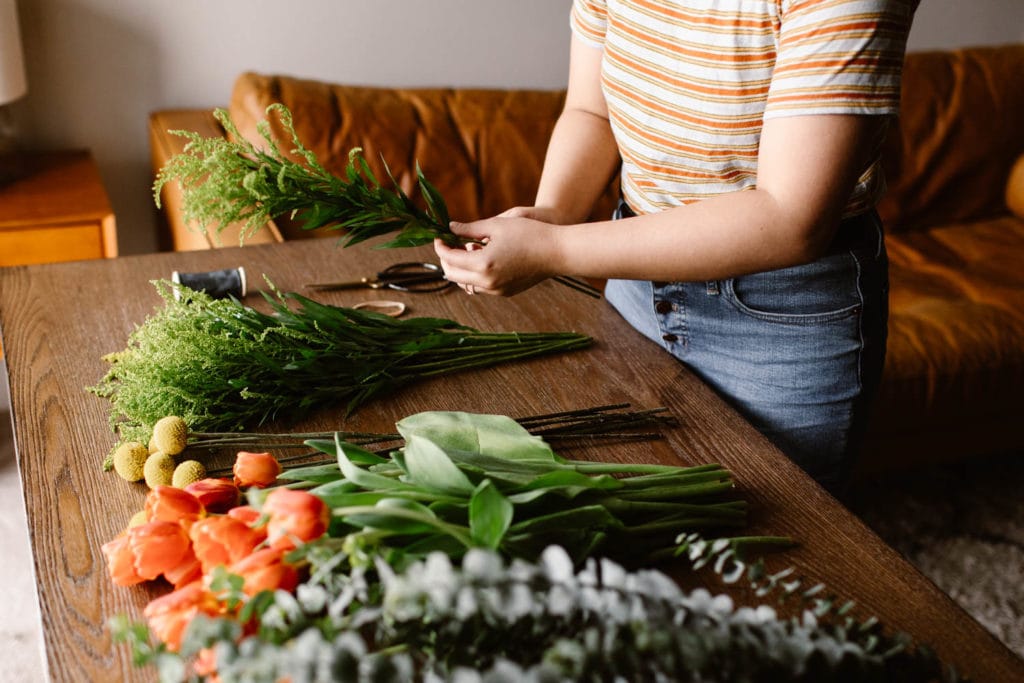
Prep your stems, if needed. Basically, you’ll just want to make sure the base of each flower (approximately 2/3 of the flower), where you’ll be holding it, doesn’t contain a whole bunch of excess leaves, thorns, etc.
Your grocery store flowers may already be prepped, which is great. But if not (many of mine weren’t), you’ll want to do this step.
Pro Tip: If you’re using eucalyptus in your DIY elopement wedding bouquet, have a sink and hand soap nearby, because eucalyptus can get very sticky!
DIY Wedding Bouquet Step 3
Start With Your Greenery, Which Will Be the Base of Your Elopement Wedding Bouquet
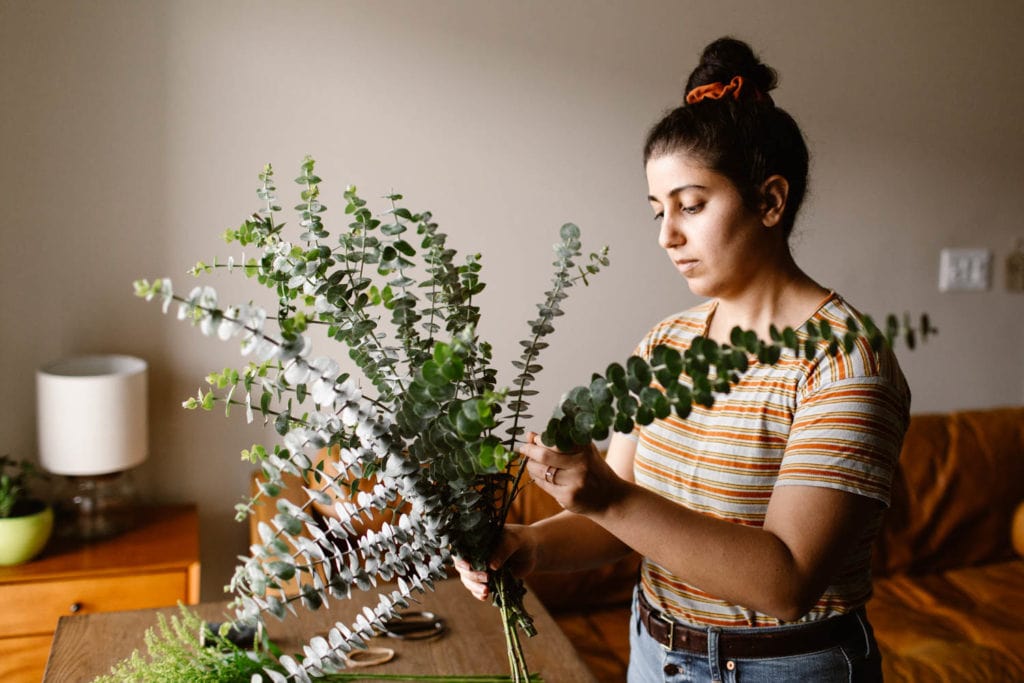
I personally love eucalyptus for adventure elopements, because it is pretty sturdy in structure and can hold its own on outdoorsy, adventurous wedding days.
When putting together your greenery you’ll want to hold and group your stems at a slanted angle, rotating the arrangement around in your hand as you go, for a more voluminous and dynamic bouquet. It may seem strange, but this is exactly how you get flowers that aren’t all mushed together and straight up and down (like they probably were when you picked up your flowers from the grocery store).

Once you have your greenery prepped, holding the bouquet might become a little more difficult. To make adding new flowers easier, without disrupting the work you’ve already done, secure the greenery with a rubber band first, before moving on to the next step.
Pro Tip: Vary the heights of the different greenery and floral stems as you’re putting together your bouquet, especially if you’re going for a more laid-back or boho bouquet. Variation in height will give some intrigue to the arrangement.
DIY Wedding Bouquet Step 4
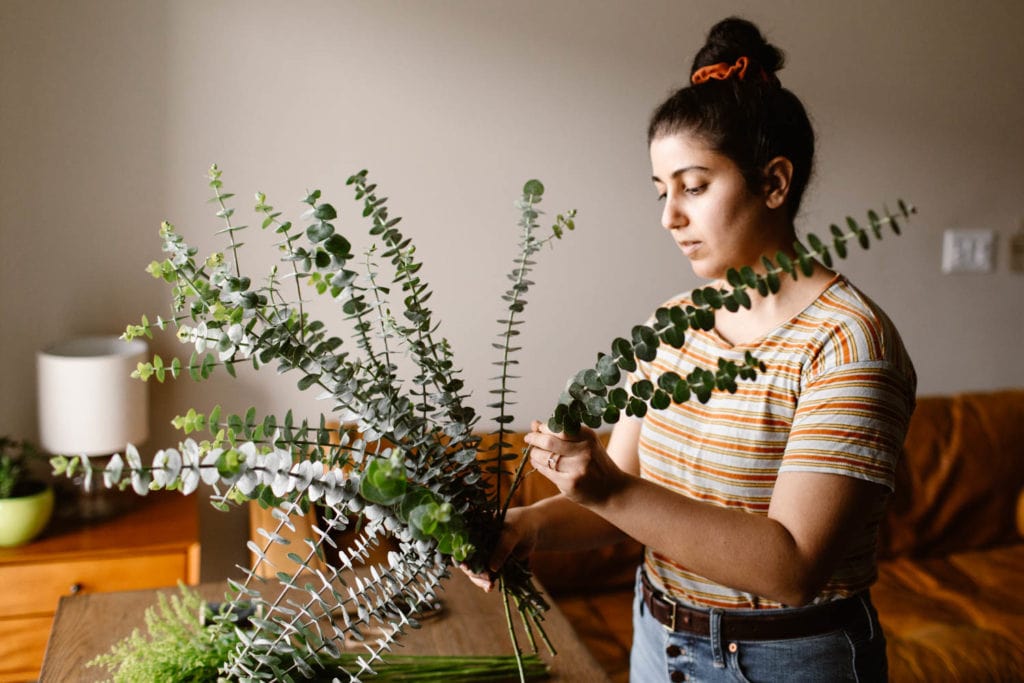
One Flower Type at a Time, Begin Adding Non-Greenery Blooms to Your Elopement Bouquet
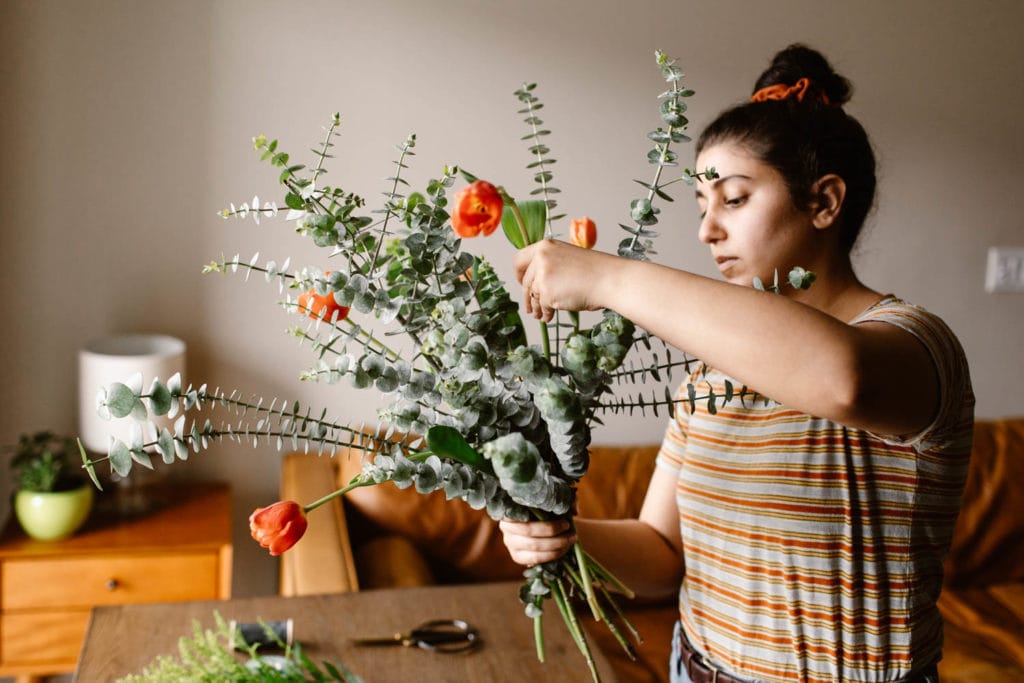
Once you have your greenery, choose the first flower you’d like to work with. Personally, I really like starting with the larger flowers first, as they provide a nice base before you add more detailed or delicate flowers in.
You’ll want to sprinkle the larger flowers throughout the bouquet, again varying heights and slanting the angle you’re holding them at.
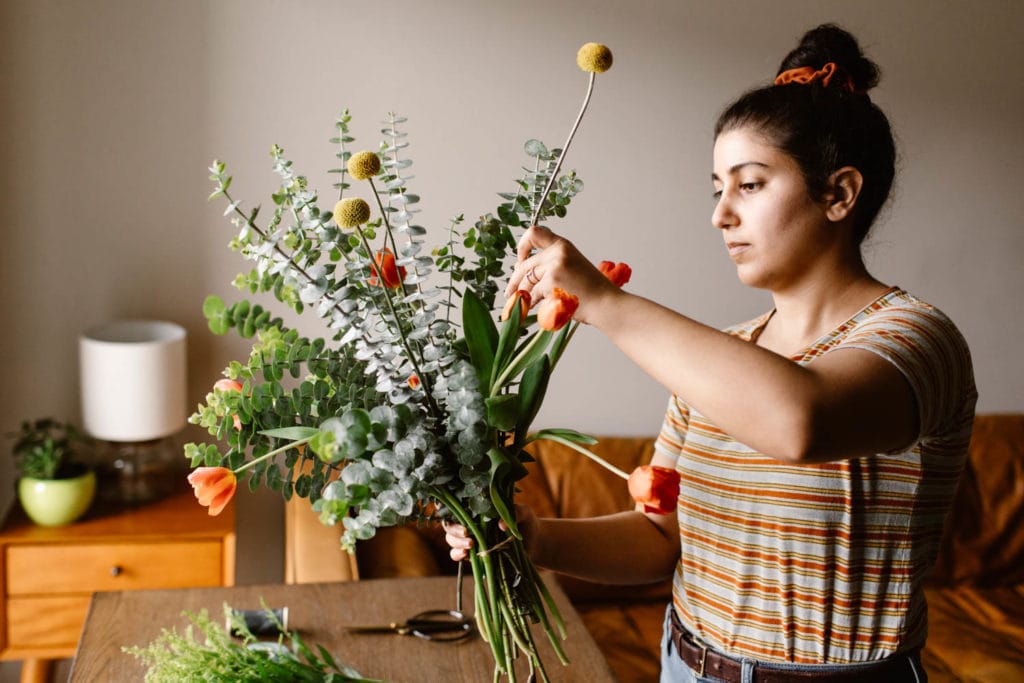
Begin adding your other flowers, doing them one kind at a time. Again, I prefer to do the most delicate, tiny, more detail-focused flowers last. Make sure you’re putting enough distance between flowers of the same type (unless you intentionally want them grouped together). This will ensure a more varied, boho look.
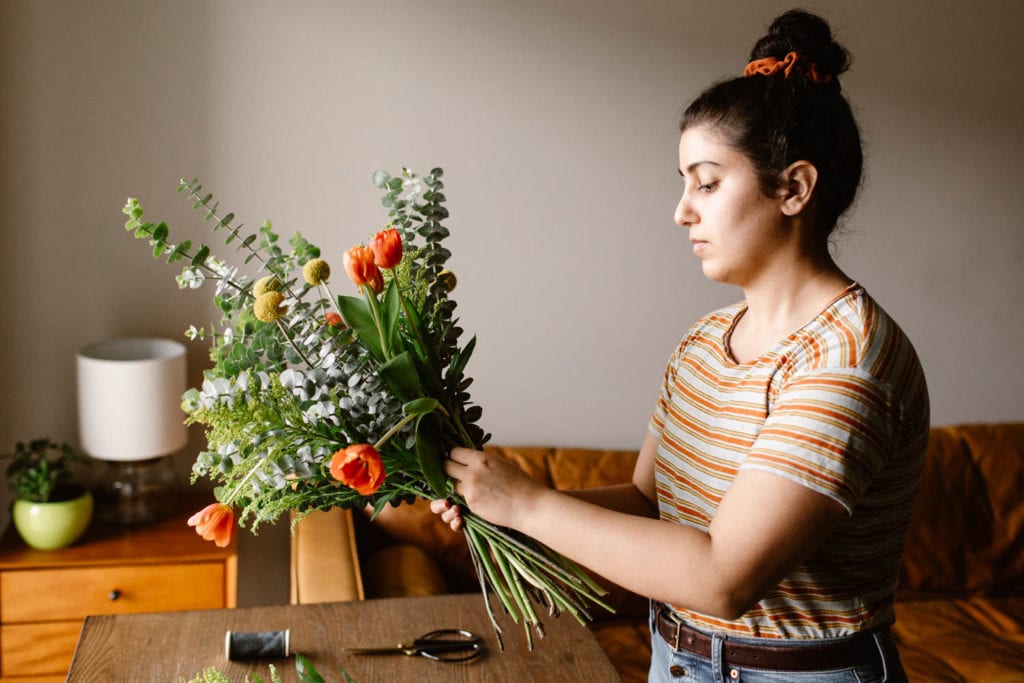
Step 5
Use Waterproof Green Floral Tape to Secure Your DIY Wedding Bouquet and Trim Your Stems
Once you feel satisfied with your floral design, use your waterproof green floral tape to further secure your DIY wedding bouquet (we don’t want flowers falling out during your elopement!). This is an important step, as we don’t want to solely count on rubber bands to keep everything together.
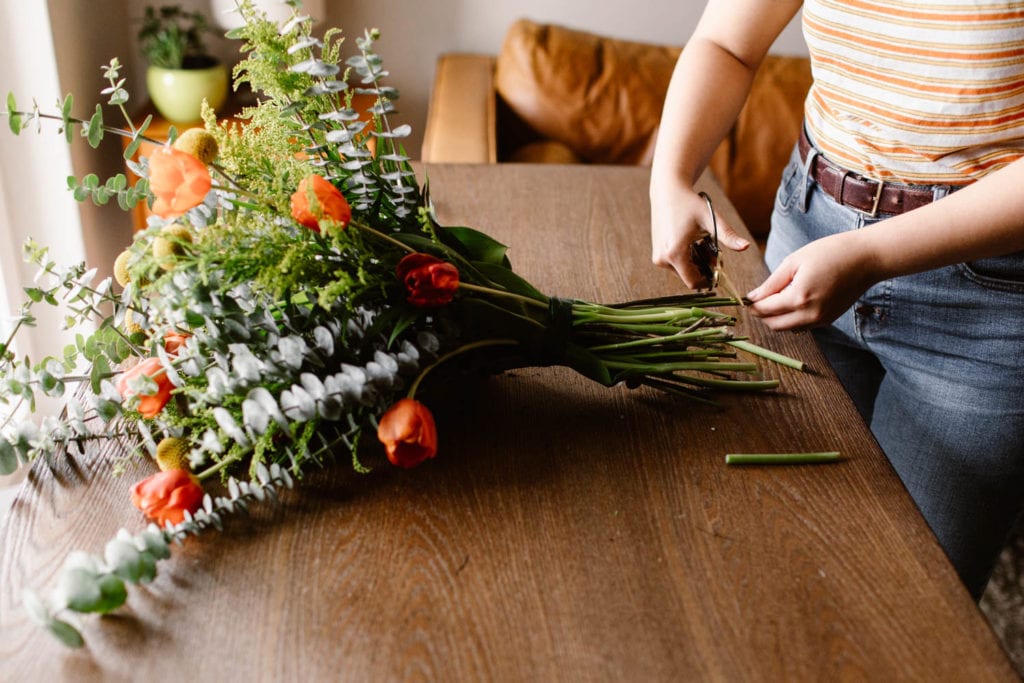
Grab your shears and trim the stems so that they are all even in length. When trimming, make sure there is still plenty of room for you to actually grip the bouquet with both hands. We don’t want to cut the stems too short.
After the stems are trimmed to the correct length, you can go in and snip the ends of each stem at an angle, which’ll allow the blooms to absorb more water than they would if they were cut completely straight across.
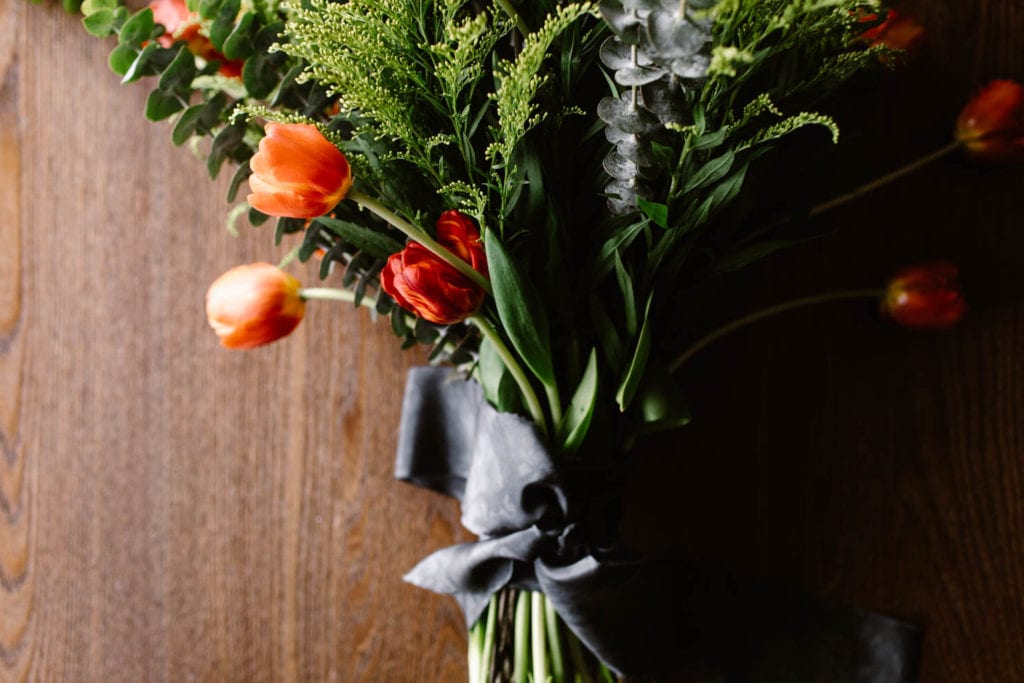
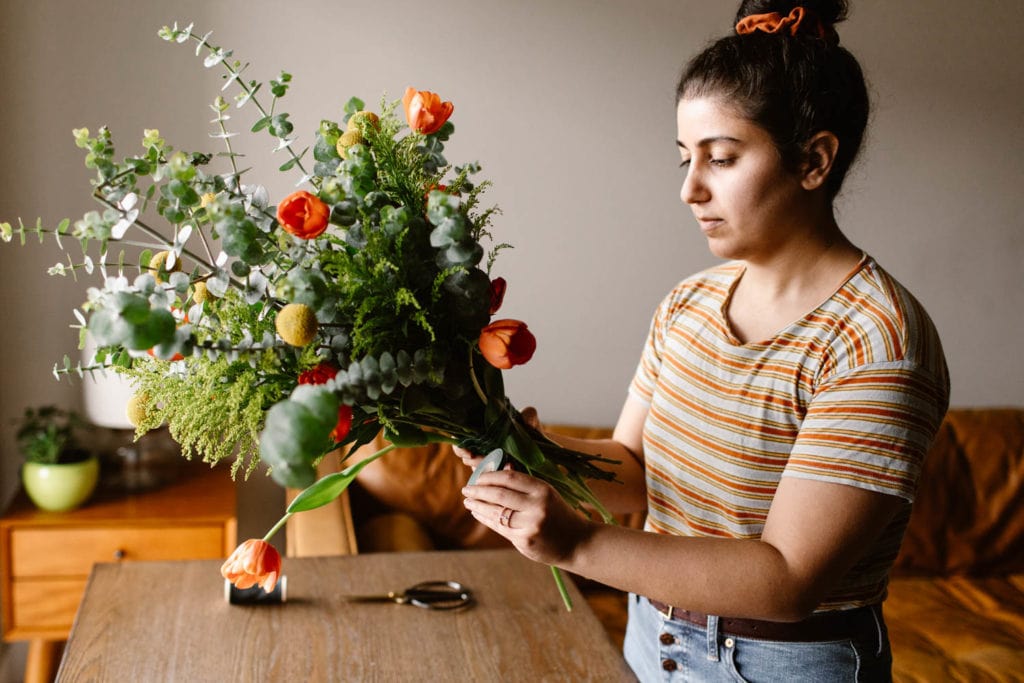
DIY Wedding Bouquet Step 6
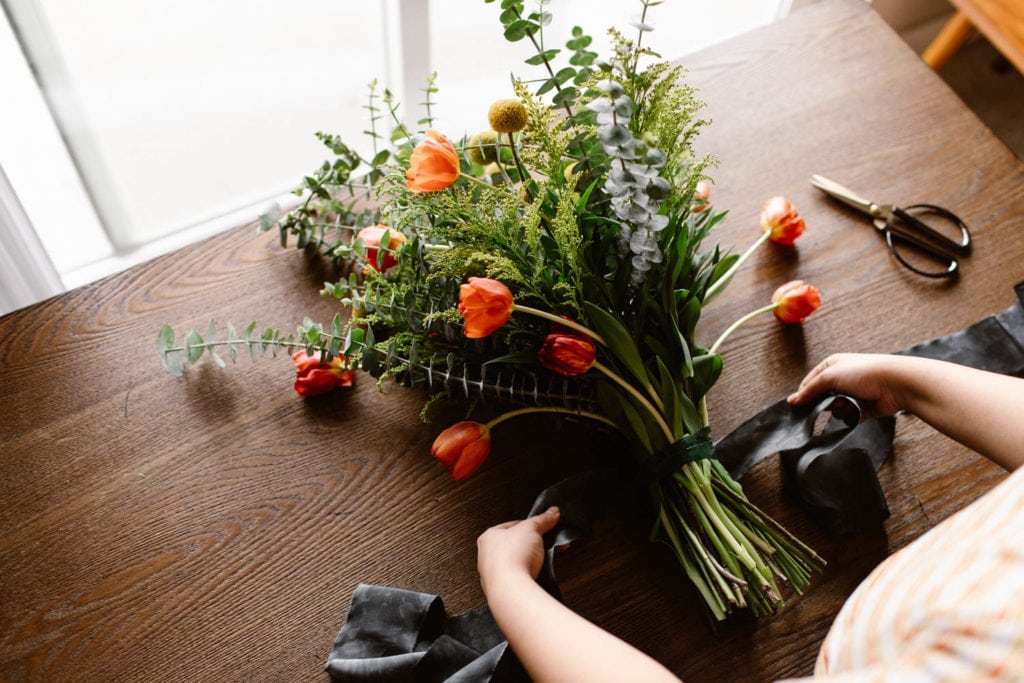
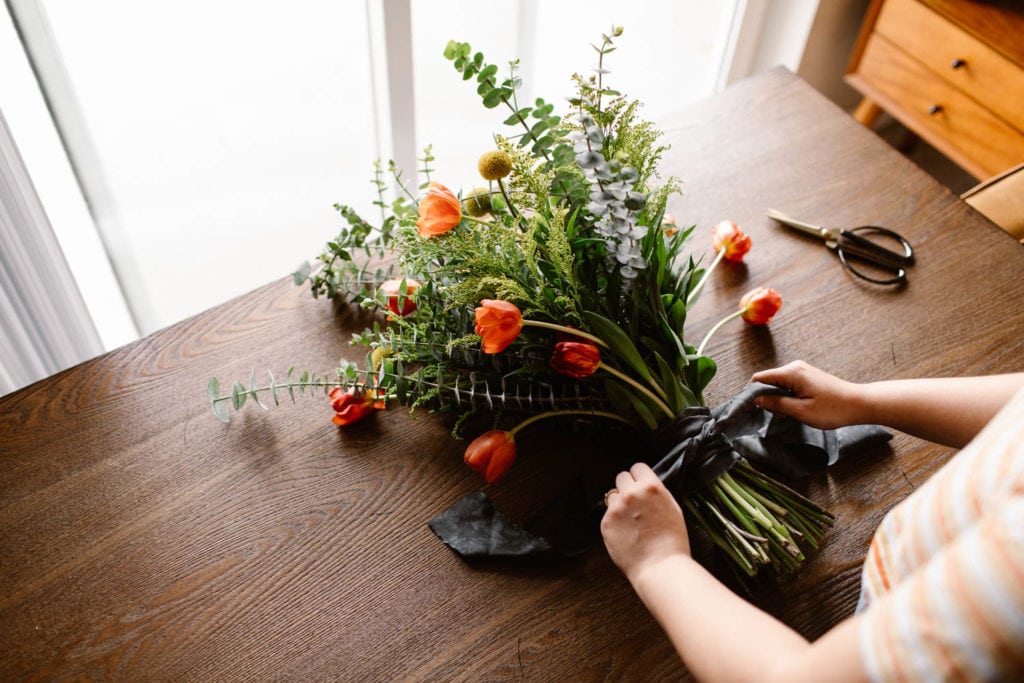
Add Your Ribbon of Choice Around the Bouquet, Over Your Floral Tape
Choose the length of ribbon you want to cut, which’ll depend on whether you want any part of the ribbon to hang down from the bouquet. Use a separate pair of scissors to snip the ribbon (not the same shears you used for your stems, if you can!).
I like to do several loops around the base of the flowers to make sure everything is nice and snug. The bouquet should be nice and comfortable to hold, and you should feel like the ribbon is completely secure.
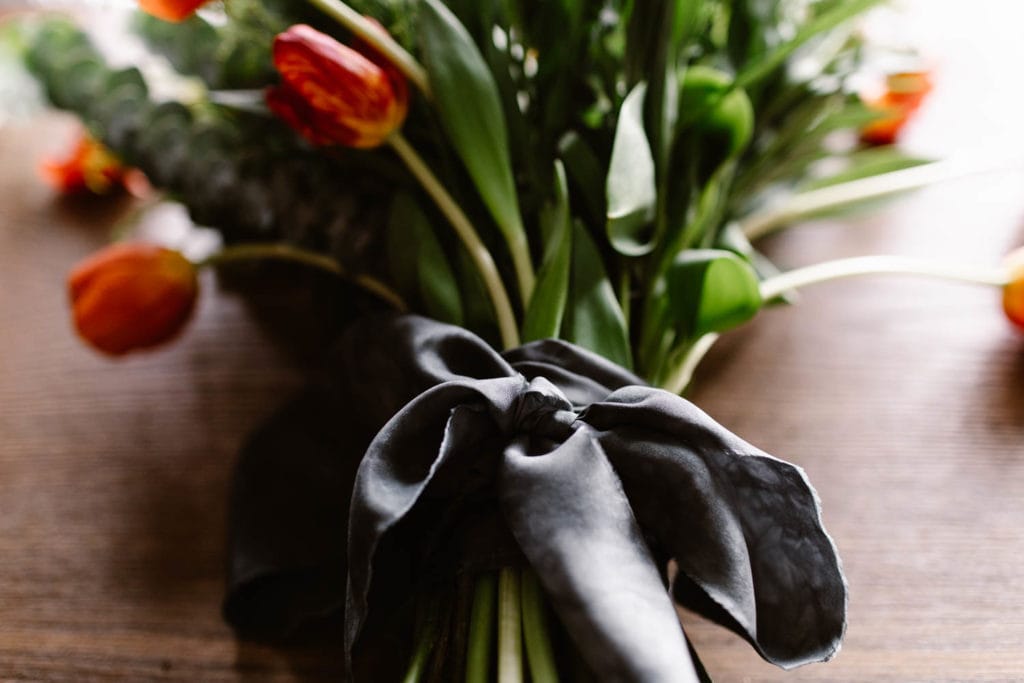
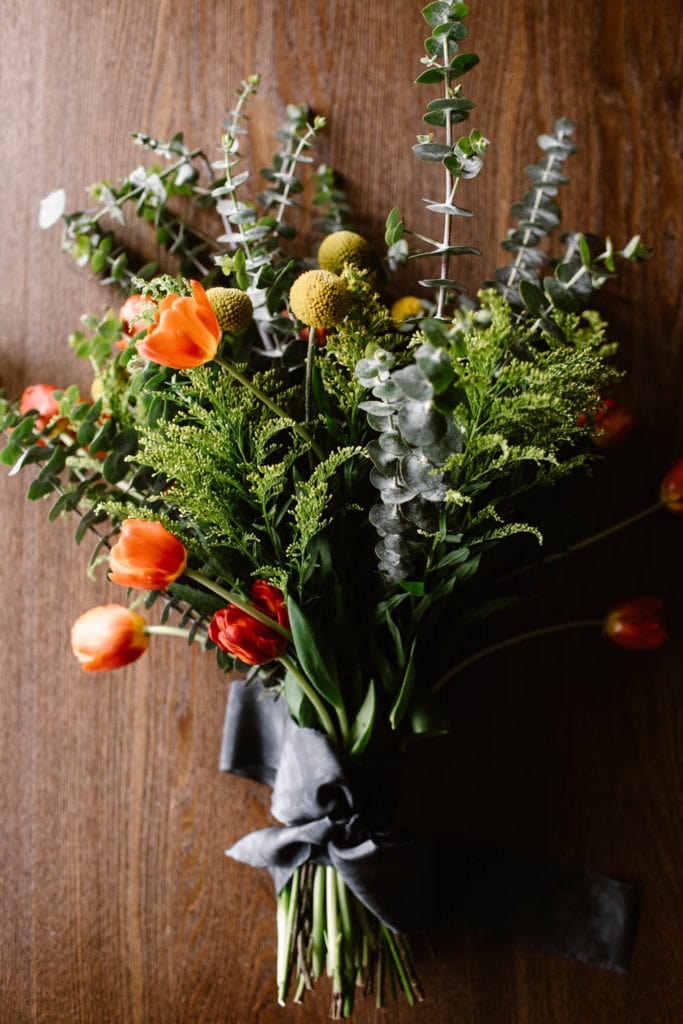
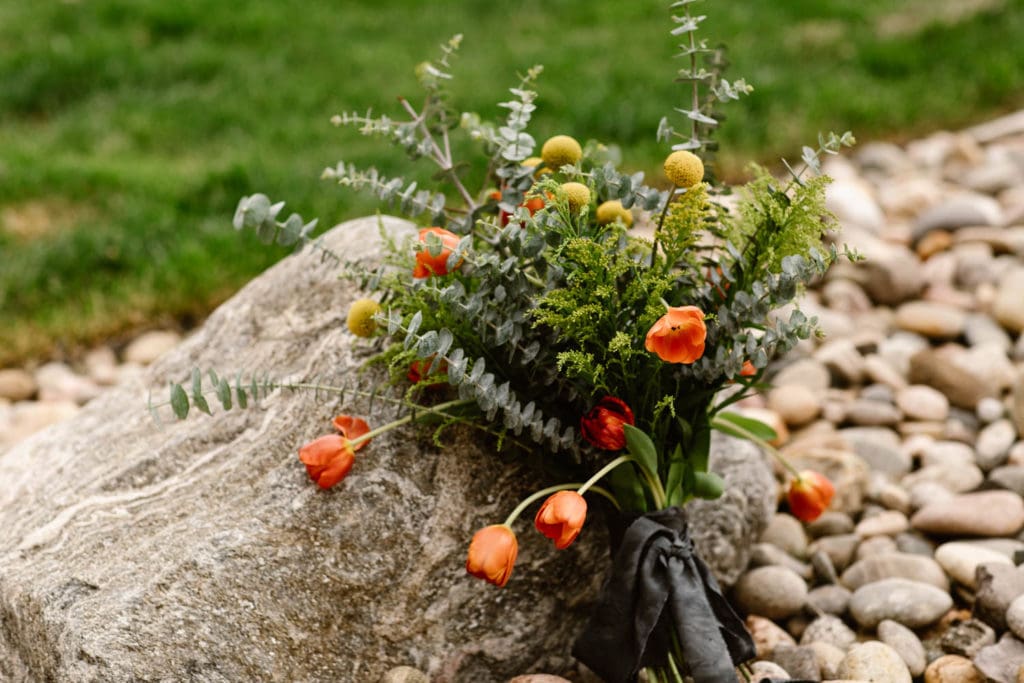
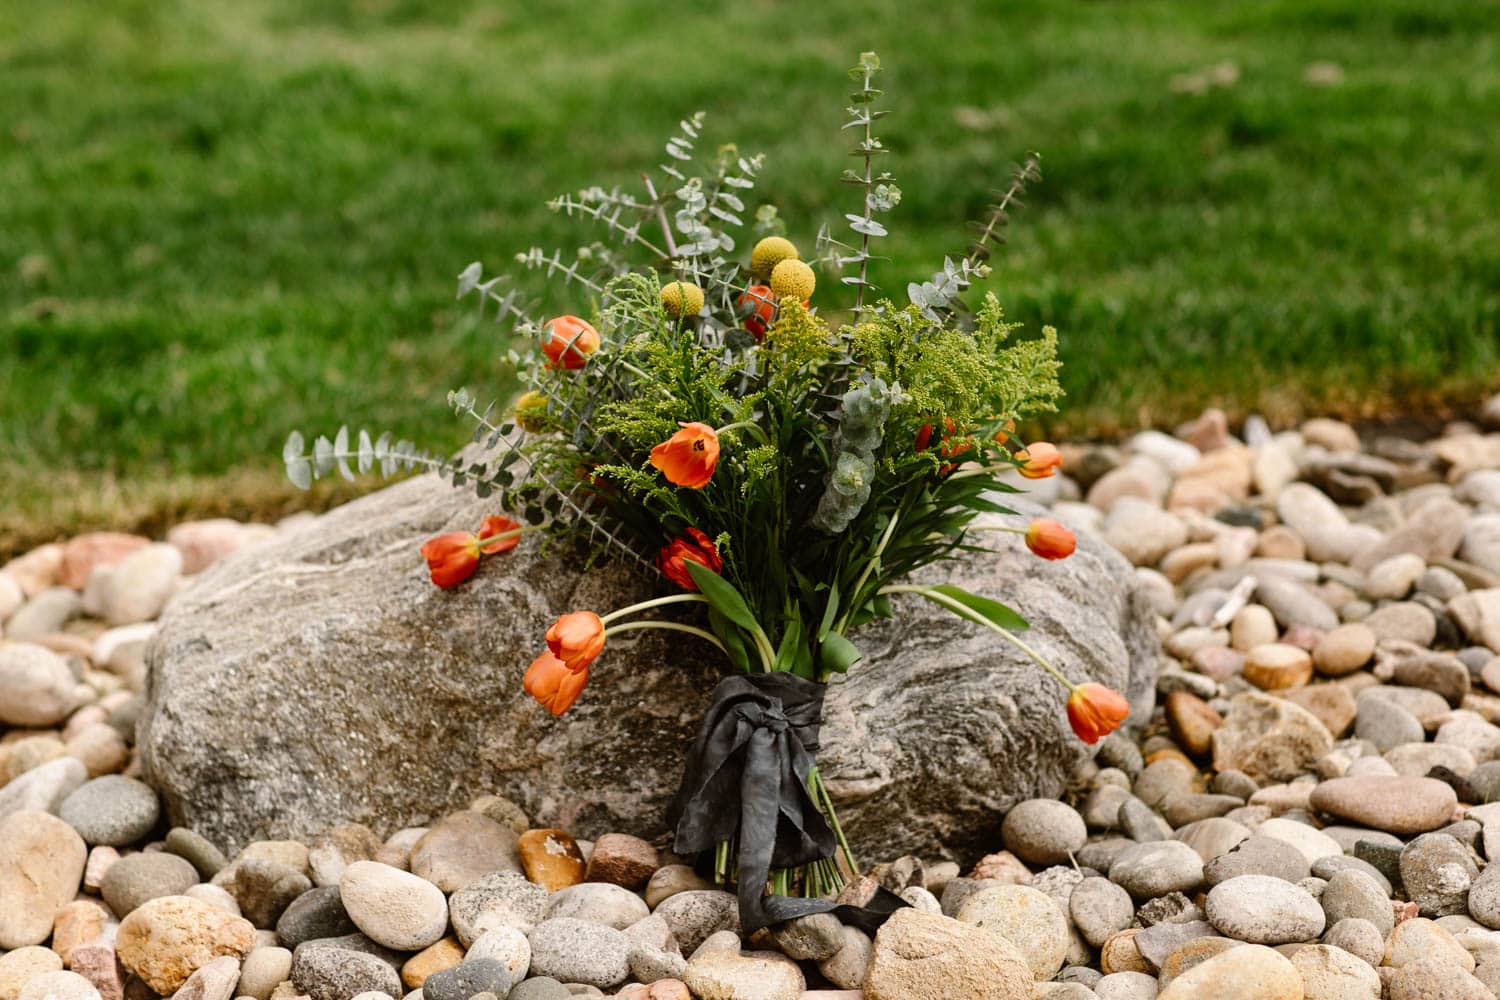
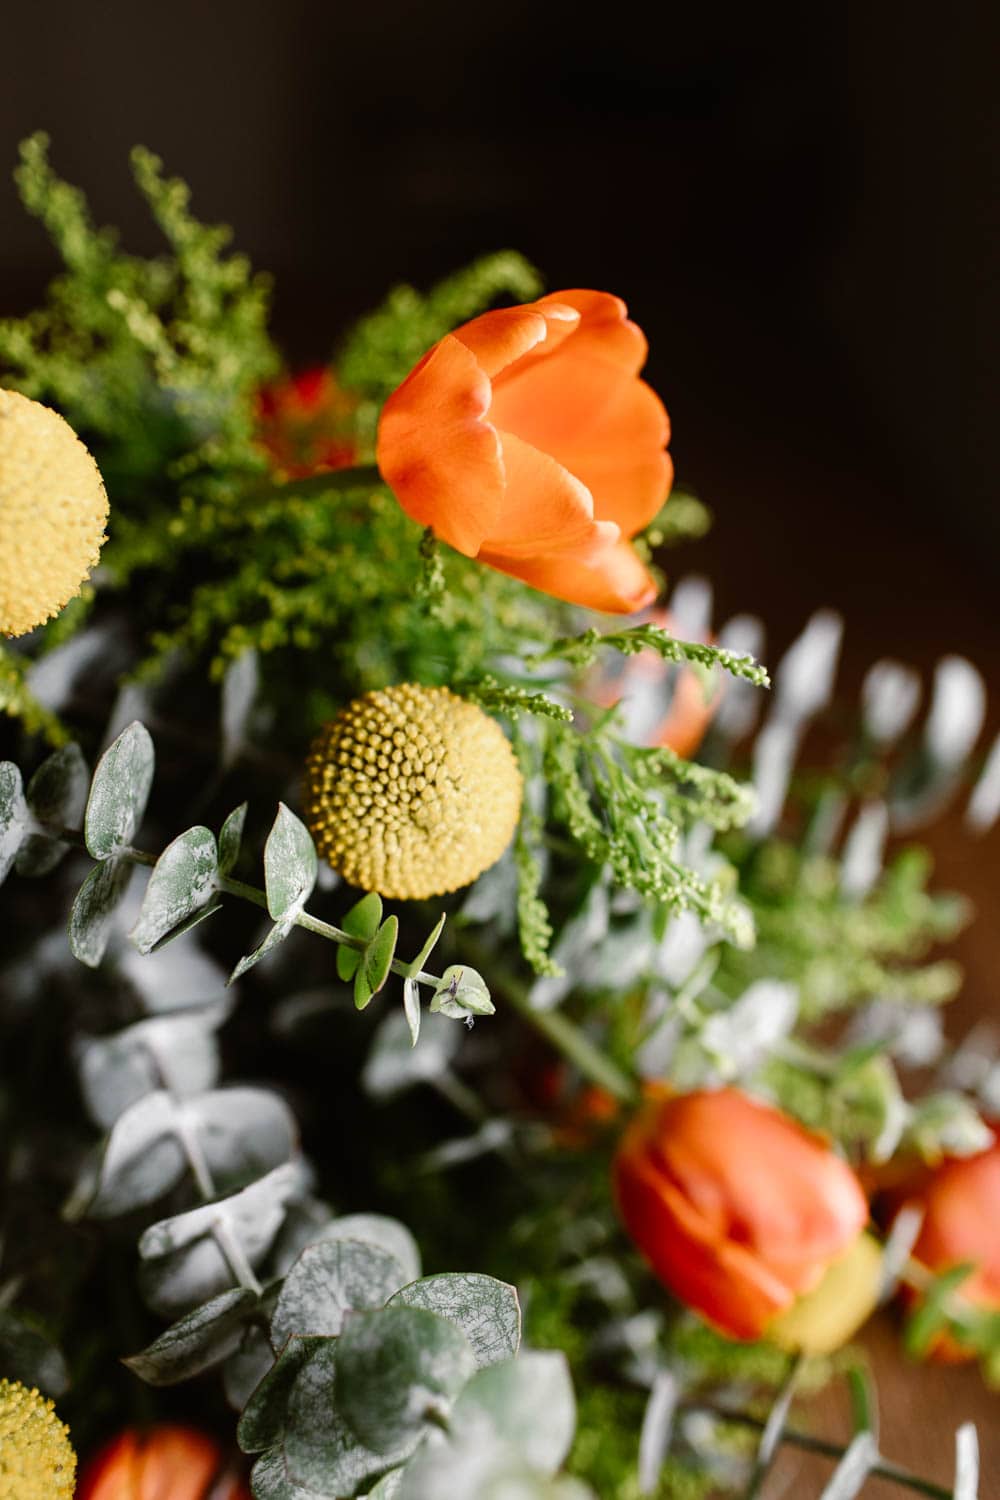
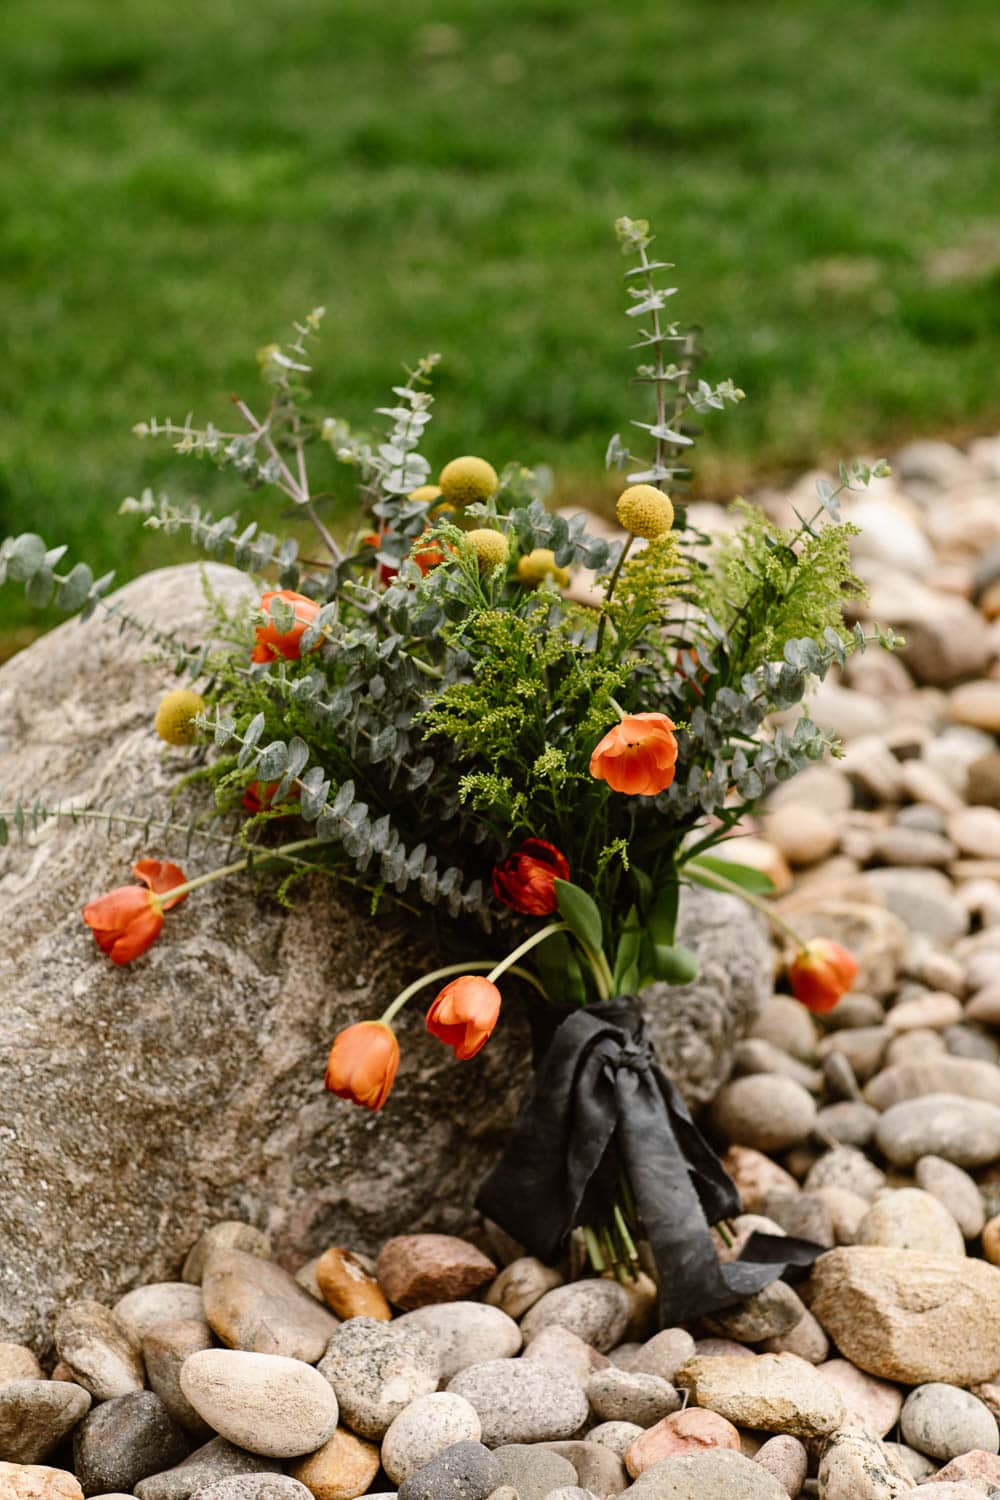
The Completed DIY Elopement Bouquet
Photos of the Final Bouquet
I absolutely love the way this DIY elopement wedding bouquet turned out. It’s perfect for the spring season, with a vibrant cheeriness to it. I love that it has a hand-crafted, boho feel that is perfect for casual, adventurous elopements. Curious how it turned out? Scroll down for a gallery of the elopement bouquet!


Advice for Caring for Your DIY Elopement Wedding Bouquet
How to Make Your DIY Bouquet Last as Long as Possible
Keep Your DIY Wedding Bouquet in Water
When It's Not in Use
If you can keep your bouquet in water while you drive to your wedding location, that’s great (just avoid getting the ribbon wet, especially if you have the strands dangling from the bouquet). If you’re hiking on your elopement day, I’d recommend wetting a hand towel and wrapping that around the base of the bouquet.
Put the hand towel and base of the bouquet into a waterproof baggie, preferably something with a little drawstring to secure it, and place it at the very top of your hiking pack (this will help avoid flowers getting smushed by other things in your bag).
Keep the Flower Food
Grocery Store Flowers Come With Flower Food...Use It!
When you get flowers at the grocery store, they usually come with flower food. Keep that handy after you put together your DIY wedding bouquet. The flower food ensures your bouquet gets the important nutrients it no longer can receive after the stems have been removed from the garden, and this food has been proven to increase the lifespan of flowers.
Hey, Friend. I've Got Your Back.
As someone who also eloped, I know firsthand what you’re going through in the elopement process. And I too, also chose to DIY my wedding bouquet.
As an elopement photographer, believe in being the go-to resource for the couples I work with. Interested in working with me for your adventure elopement? Click the button below to schedule your complimentary elopement chat or view my pricing page to see how I can help you bring your dream elopement to life.
Planning Your Adventure Elopement?
Check out some of our favorite elopement and adventure wedding planning resources:
Sheena Shahangian Photography LLC
Empowering You To Have Your Adventure Elopement, Your Way
Colorado Elopement Photographers + Adventure Wedding Photographers